
Why a toolkit, and why a lab board
2 min readEvery line of C you will write in this program travels the same path: you type it in an editor, a compiler turns it into a program, you run the program and watch it misbehave, a debugger shows you why, and a version-control system saves the working version before you break it again. The tools in this lesson exist so that path is fast and safe.
the set of programs that turns source code into a running program, here gcc or clang plus the assembler and linker
You will need, on your Linux machine: a good terminal, a shell you can drive, a text editor, a compiler and debugger, Git, QEMU for emulation, and Python for the tooling scripts later in the program. Install the essentials in one command on Ubuntu, WSL2 or a Debian container:
sudo apt update
sudo apt install build-essential gdb git qemu-system-x86 qemu-system-arm python3 python3-venv
build-essential pulls in gcc, the make build tool and the C library headers. gdb is the debugger. python3 -m venv is how you later create isolated Python environments for the automation modules. On Windows you will want Windows Terminal (install it from the Microsoft Store) and WSL2 from the previous lesson, because the whole program assumes a Unix shell.
The edit-build-run-debug loop is identical on a laptop and on a board. On the board only the last two steps move: you build on the host or the board, then run on the board and debug over SSH or serial.
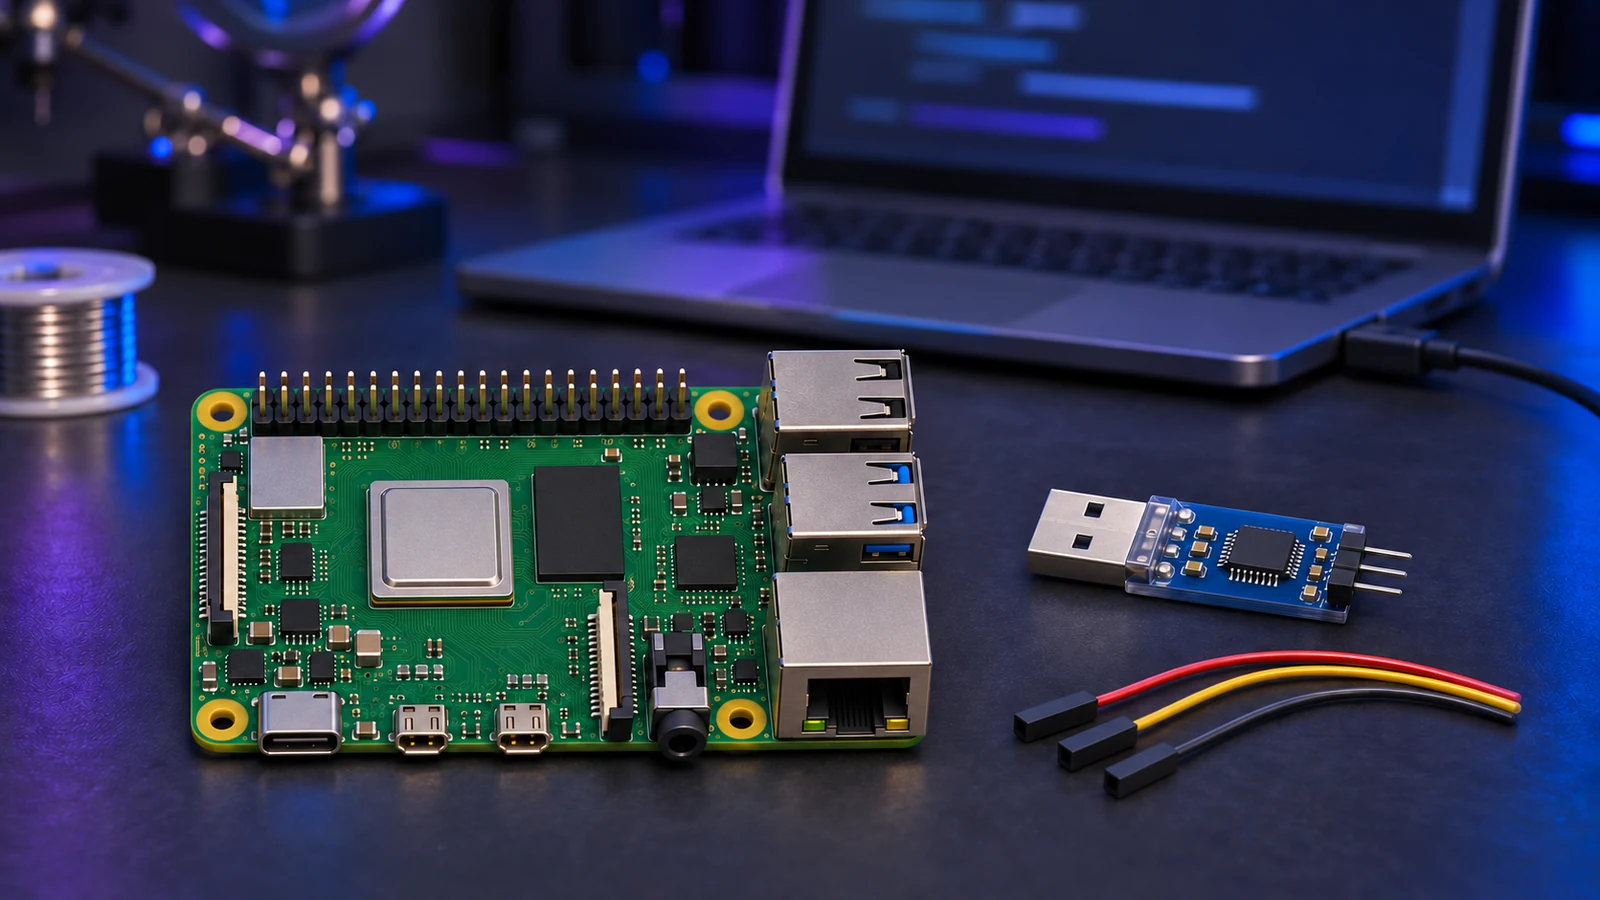
Why a lab board at all, when the next section hands you a QEMU virtual machine? Because emulation never catches a loose ground wire, a wrong baud rate, a brownout when a motor starts, or a driver that only misbehaves on the real silicon. The Raspberry Pi is this program's lab bench: cheap, widely available, and it runs the same Linux kernel as a production device.
The terminal and the shell
5 min readLearn a handful of navigation commands first: pwd prints the current directory, ls lists it, cd moves elsewhere, and mkdir, rm, cp and mv manage files. cd .. goes up one level and cd ~ returns home.
When you type a command, the shell does not search the whole disk. It reads the a colon-separated list of directories the shell searches for the program you typed in order and runs the first match. echo $PATH shows it, and which gcc or type gcc reveals which file the shell will run. PATH is an a name=value pair inherited by every process you start, one of many such as HOME and SHELL.
echo $PATH
which gcc
export PATH="$HOME/bin:$PATH"
The last line prepends your own bin directory so your scripts are found first. Put it in ~/.bashrc to make it stick, alongside an a short name you define for a longer command, expanded by the shell before execution:
alias ll='ls -l'
alias ..='cd ..'
Command history saves retyping: the up arrow replays earlier lines, history lists them, and Ctrl-R searches backwards as you type.
Two commands connect programs together, and you will use both constantly. Redirection sends output to a file instead of the screen: > overwrites, >> appends, and 2>&1 sends the error stream to the same place as normal output. A pipe | feeds one program's output into the next as input.
gcc -v 2>&1 | tee build.log
sudo dmesg | grep -i uart
The first line captures both the normal and error output of gcc into a file while still showing it; the second filters kernel messages (Ubuntu restricts the kernel log to administrators, hence sudo). In both, one program's output becomes another's input, and that idea of small tools joined by pipes is the heart of working with Linux.
Try it below:
Use nano for quick edits: type, then Ctrl+O to save and Ctrl+X to exit. For vim learn only the minimum now: press i to insert, Esc to leave insert mode, x to delete a character, and :wq to write and quit (or :q! to abandon changes).
learner@embeddex:~/lab/work$ touch notes.txt
learner@embeddex:~/lab/work$ # list it
learner@embeddex:~/lab/work$ ls -l
total 0
-rw-r--r-- 1 learner learner 0 Nov 15 05:53 notes.txt
learner@embeddex:~/lab/work$ # up one level
learner@embeddex:~/lab/work$ cd ..
learner@embeddex:~/lab$ # PATH is a colon-separated list of directories
learner@embeddex:~/lab$ echo $PATH | tr ':' '\n' | head -5
/usr/local/sbin
/usr/local/bin
/usr/sbin
/usr/bin
/sbin
learner@embeddex:~/lab$ # which file runs when you type gcc
learner@embeddex:~/lab$ which gcc
/usr/bin/gcc
learner@embeddex:~/lab$ # cd is a shell builtin, not a file on disk
learner@embeddex:~/lab$ type cd
cd is a shell builtin
learner@embeddex:~/lab$ # type gcc shows the path too, and that it is external
learner@embeddex:~/lab$ type gcc
gcc is /usr/bin/gcc
learner@embeddex:~/lab$ # > overwrites: write the first line
learner@embeddex:~/lab$ echo boot > log.txt
learner@embeddex:~/lab$ # >> appends the second line
learner@embeddex:~/lab$ echo panic >> log.txt
learner@embeddex:~/lab$ # and a third
learner@embeddex:~/lab$ echo boot >> log.txt
learner@embeddex:~/lab$ # redirection > wrote them
learner@embeddex:~/lab$ cat log.txt
boot
panic
boot
learner@embeddex:~/lab$ # < feeds the file in as input
learner@embeddex:~/lab$ wc -l < log.txt
3
learner@embeddex:~/lab$ # a pipe keeps only the matching lines
learner@embeddex:~/lab$ cat log.txt | grep boot
boot
boot
learner@embeddex:~/lab$ # pipes chain, each program doing one job
learner@embeddex:~/lab$ sort log.txt | uniq -c
      2 boot
1 paniclearner@embeddex:~/lab$ # the script exists, but note its permissions learner@embeddex:~/lab$ ls -l hi -rw-r--r-- 1 learner learner 35 Nov 15 05:53 hi learner@embeddex:~/lab$ # run it by path: permission denied learner@embeddex:~/lab$ ./hi bash: ./hi: Permission denied learner@embeddex:~/lab$ # add the execute bit learner@embeddex:~/lab$ chmod +x hi learner@embeddex:~/lab$ # now the path form runs learner@embeddex:~/lab$ ./hi hi from the sandbox learner@embeddex:~/lab$ # the bare name still fails: . is not on PATH learner@embeddex:~/lab$ hi bash: hi: command not found
VS Code and the remote extensions
2 min readInstall VS Code from code.visualstudio.com or, on Ubuntu, from the official apt repository. The code command opens it from the shell. Then install three extensions: WSL (formerly called Remote - WSL), Remote - SSH, and the C/C++ extension (its extension id is ms-vscode.cpptools).
The remote extensions change where your files and commands live. With the WSL extension, the editor opens a window whose shell, compilers and filesystem are inside WSL2, while the window itself runs on Windows. With Remote - SSH, the same trick reaches a machine over the network: you open ssh user@host, and everything you type and build happens on that machine. For this program the payoff is that you can edit on the board directly through VS Code, or edit on the host and copy files across.
The C/C++ extension adds three things. IntelliSense gives you code completion, hover information and parameter hints as you type. Inline errors underline mistakes with red squiggles before you compile, because the extension runs the compiler's front end over your file. Integrated debugging lets you set breakpoints, step, and inspect variables without leaving the editor; under the hood it drives gdb or lldb.
The last two features read their settings from two JSON files in a hidden .vscode folder. tasks.json describes build tasks, such as running gcc -g -o hello hello.c with one keypress. launch.json describes how to start a program under the debugger and which binary to load. You do not need to write these from scratch: the extension can generate both, and you will customise them in the C toolchain lesson.
{
  "version": "2.0.0",
  "tasks": [
    { "label": "build", "type": "shell",
      "command": "gcc", "args": ["-g", "-o", "hello", "hello.c"] }
  ]
}
The short form above is all a build task is: a label, a shell command and its arguments. A launch configuration adds the debugger side, naming the program to run and the debugger to use.
Git: snapshots and sharing
4 min readA repository, a directory whose entire history Git records in a hidden .git folder, starts either from scratch or from a copy. git init creates an empty one; git clone URL downloads a complete copy of someone else's, including all history. The program's course repository is distributed this way, so your first real command will be a clone.
Edit: you modify files in the working tree, the ordinary directory you see.
Stage:
git add file.ccopies the change into the staging area, the next snapshot in waiting.Commit:
git commit -m 'message'freezes the staged changes into the repository as a permanent snapshot.Push:
git pushsends new commits to a remote such as GitHub or GitLab.Pull:
git pullbrings other people's new commits back to your machine.
The staging area is the part people forget. Until you git add, a change is not part of any commit; git status shows what is staged, what is modified, and what is untracked. git diff shows unstaged changes, and git diff --staged shows what will be committed. git log lists history.
Before your first commit, tell Git who you are:
git config --global user.name "Your Name"
git config --global user.email "you@example.com"
A .gitignore file lists files Git should never track, such as build outputs and editor noise:
build/
*.o
*.swp
Branching lets you work on a copy of the history without disturbing the main line. git branch feature creates a branch, git switch feature (or the older git checkout feature) moves onto it, and git switch -c name creates and moves in one step. You merge branches back later; for now the point is that a branch is a movable label on a commit, not a copy of your files.
To share over SSH, you need a key on the host. Generate one with ssh-keygen -t ed25519 -C "you@example.com", then paste the public half (~/.ssh/id_ed25519.pub) into the SSH keys page of GitHub or GitLab. Test with ssh -T git@github.com. The next section covers what that key actually is.
On branch main

No commits yet

Changes to be committed:
  (use "git rm --cached <file>..." to unstage)
        new file:   README.md

learner@embeddex:~/lab/demo$ # freeze the snapshot
learner@embeddex:~/lab/demo$ git commit -m 'first commit'
[main (root-commit) 3d51c17] first commit
 1 file changed, 1 insertion(+)
 create mode 100644 README.md
learner@embeddex:~/lab/demo$ # one commit in history
learner@embeddex:~/lab/demo$ git log --oneline
3d51c17 first commit
learner@embeddex:~/lab/demo$ # branch off to experiment
learner@embeddex:~/lab/demo$ git switch -c feature
Switched to a new branch 'feature'
learner@embeddex:~/lab/demo$ # two branches, feature checked out
learner@embeddex:~/lab/demo$ git branch
* feature
mainCompilers: gcc and clang
4 min readBoth compilers turn C source into machine code. gcc is the GNU compiler, the default on Linux; clang is the LLVM-based compiler, often faster to compile and with clearer error messages. They accept the same C language, so clang can replace gcc in almost every command you will see. Compile a first program and run it:
gcc -o hello hello.c
./hello
-o hello names the output; without it the result is a file called a.out. Useful flags you will use constantly: -g embeds debug information, -Wall -Wextra turn on warnings, and -O2 enables optimisation (which, as a beginner, you should usually leave off so the debugger lines up with your source).
Behind that one command is a pipeline of four stages, each a separate program the driver runs for you.
1preprocess
The preprocessor expands #include and #define directives, producing a pure C translation unit.
2compile
The real compiler, the cc1 program, turns that C into assembly language for the target CPU.
3assemble
The as assembler converts the assembly into an object file of machine code plus symbols.
4link
The linker (ld, reached through a wrapper called collect2) joins your object file with the C library into one executable.
You can stop at any stage. -E stops after preprocessing, -S after compiling to assembly, and -c after assembling to an object file. Each output is worth opening once, because it makes the whole rest of the program concrete.
gcc -E hello.c -o hello.i   # preprocessed C
gcc -S hello.c -o hello.s   # assembly
gcc -c hello.c -o hello.o   # object file
Run gcc -v to watch the driver confess its sub-commands. Typical output (yours will differ):
$ gcc -v -o hello hello.c
Using built-in specs.
Target: x86_64-linux-gnu
 ...
 /usr/lib/gcc/x86_64-linux-gnu/<version>/cc1 hello.c ... -o /tmp/ccXXXX.s
 as --64 -o /tmp/ccYYYY.o /tmp/ccXXXX.s
 /usr/lib/gcc/x86_64-linux-gnu/<version>/collect2 ... -o hello /tmp/ccYYYY.o ...
The Target line names the a three-part machine-vendor-operating-system name describing which CPU the compiler produces code for, such as x86_64-linux-gnu. This matters enormously for embedded work: a compiler whose triple begins x86_64 builds programs for your laptop, while aarch64-linux-gnu-gcc builds for a 64-bit ARM board like the Pi. Building for a different CPU than the one you are running on is called cross-compilation, and it returns throughout the program.
Going deeperWhere the compiler lives and what it really runs
The cc1 binary sits under /usr/lib/gcc/<triple>/<version>/, not on your PATH, which is why you never run it by hand. collect2 is a wrapper that knows how to find startup objects such as crt1.o (which contains _start, the real entry point that calls main) and the C library before handing off to ld. The preprocessor is not a separate binary in modern gcc: cc1 performs preprocessing internally, although a standalone cpp still exists. clang follows the same four stages but replaces cc1 with its own front end and may use the LLVM lld linker instead of GNU ld. When a build fails with a message about ld or collect2, the linker cannot find a symbol: a missing library, a misspelt function name, or a source file you forgot to list.
r /lib64/ld-linux-x86-64.so.2, BuildID[sha1]=47566eaefd3e2283aa9dde1719520798f7119954, for GNU/L
inux 3.2.0, not stripped
learner@embeddex:~/lab$ # the driver confesses its sub-commands
learner@embeddex:~/lab$ gcc -v -o hello hello.c 2>&1 | grep -E 'Target:|cc1|--64|collect2'
Target: x86_64-linux-gnu
 /usr/libexec/gcc/x86_64-linux-gnu/13/cc1 -quiet -v -imultiarch x86_64-linux-gnu hello.c -quiet
-dumpbase hello.c -dumpbase-ext .c -mtune=generic -march=x86-64 -version -fasynchronous-unwind-t
ables -fstack-protector-strong -Wformat -Wformat-security -fstack-clash-protection -fcf-protecti
on -o /tmp/cccs0FIi.s
 as -v --64 -o /tmp/ccuDORxu.o /tmp/cccs0FIi.s
 /usr/libexec/gcc/x86_64-linux-gnu/13/collect2 -plugin /usr/libexec/gcc/x86_64-linux-gnu/13/libl
to_plugin.so -plugin-opt=/usr/libexec/gcc/x86_64-linux-gnu/13/lto-wrapper -plugin-opt=-fresoluti
on=/tmp/ccidhsrG.res -plugin-opt=-pass-through=-lgcc -plugin-opt=-pass-through=-lgcc_s -plugin-o
pt=-pass-through=-lc -plugin-opt=-pass-through=-lgcc -plugin-opt=-pass-through=-lgcc_s --build-i
d --eh-frame-hdr -m elf_x86_64 --hash-style=gnu --as-needed -dynamic-linker /lib64/ld-linux-x86-
64.so.2 -pie -z now -z relro -o hello /usr/lib/gcc/x86_64-linux-gnu/13/../../../x86_64-linux-gnu
/Scrt1.o /usr/lib/gcc/x86_64-linux-gnu/13/../../../x86_64-linux-gnu/crti.o /usr/lib/gcc/x86_64-l
inux-gnu/13/crtbeginS.o -L/usr/lib/gcc/x86_64-linux-gnu/13 -L/usr/lib/gcc/x86_64-linux-gnu/13/..
/../../x86_64-linux-gnu -L/usr/lib/gcc/x86_64-linux-gnu/13/../../../../lib -L/lib/x86_64-linux-g
nu -L/lib/../lib -L/usr/lib/x86_64-linux-gnu -L/usr/lib/../lib -L/usr/lib/gcc/x86_64-linux-gnu/1
3/../../.. /tmp/ccuDORxu.o -lgcc --push-state --as-needed -lgcc_s --pop-state -lc -lgcc --push-s
tate --as-needed -lgcc_s --pop-state /usr/lib/gcc/x86_64-linux-gnu/13/crtendS.o /usr/lib/gcc/x86
_64-linux-gnu/13/../../../x86_64-linux-gnu/crtn.o
QEMU: a machine in software
2 min readWhen you run QEMU, it reads the guest's machine-code instructions one block at a time and translates them into instructions your real CPU can run, a technique called dynamic binary translation. It also emulates the hardware around the CPU: RAM, a disk controller, a network card, a serial port and a display. To the guest operating system, it looks like real hardware.
reproducing one computer's behaviour on another by translating its instructions, slower than running natively
The qemu-system-* family provides one binary per target. qemu-system-x86_64 emulates a 64-bit PC, while qemu-system-arm and qemu-system-aarch64 emulate 32-bit and 64-bit ARM machines. Boot a small disk image with:
qemu-system-x86_64 -m 512 -hda disk.img
-m 512 gives the guest 512 MB of RAM and -hda disk.img attaches a virtual hard disk. To try an ARM machine without hardware, a command such as qemu-system-aarch64 -M virt -cpu cortex-a57 -m 1G -nographic -kernel Image boots a kernel for a generic virtual ARM board.
Why does this program make you install it now? Because the embedded modules that follow, M4 and M5, build entire Linux images for ARM boards. Testing every image on real hardware is slow and expensive, so build systems such as Yocto and Buildroot run their images in QEMU first, and only the final image goes to a board. You are learning the tool you will rely on when your real board is not plugged in, and the M11 virtualization module will open the hood and add a device of your own.
Going deeperTCG and KVM: why emulation is slower than the real thing
QEMU's software translator is called TCG, the Tiny Code Generator. Every guest instruction becomes several host instructions, and every emulated device access is handled in software, so a guest can run many times slower than native code. When the guest and host share the same architecture, QEMU can instead use KVM, a Linux kernel feature that lets the guest run directly on the CPU with hardware virtualization. KVM is fast but only works same-architecture; TCG works everywhere, which is exactly what you need to run ARM guests on an x86 laptop. The two are often combined, with QEMU providing the devices and KVM providing the CPU.
The Raspberry Pi as a lab board
3 min readPick a model for the course. The Pi 4 uses a quad-core Cortex-A72, the Pi 5 a quad-core Cortex-A76, and both are fine; the Pi Zero 2 W is the cheap, minimal option that runs the same software with less RAM. The Pi 5 is the comfortable default for the heavier modules. You need a microSD card (16 GB or more), a power supply, and for first boot an HDMI cable, keyboard and mouse, or none of them if you go headless.
The operating system image is Raspberry Pi OS, a Debian-based Linux. The official Raspberry Pi Imager writes it to the SD card and, crucially, lets you preconfigure everything so the board boots straight onto your network. In the Imager you can set the hostname, a username and password, enable SSH, and enter your Wi-Fi name and passphrase. The dd alternative copies a downloaded image byte for byte:
sudo dd if=raspios.img of=/dev/sdX bs=4M status=progress
A running a computer with no monitor, keyboard or mouse attached, controlled only over the network or a serial line board is the normal state for an embedded device, so this lesson makes it your default. Raspberry Pi OS reads a few optional files from the small FAT partition on the SD card at first boot. An empty file named ssh turns on the SSH server. A file named userconf.txt containing username:password-hash creates the first user, where the hash comes from openssl passwd -6. The Imager writes all of this for you, which is the modern path; the files are what it writes on Raspberry Pi OS Bookworm, and you can create them by hand if you image with dd. Newer releases are moving first-boot setup to cloud-init files, which is one more reason to let the Imager do it.
openssl passwd -6
# paste the output after "yourname:" into userconf.txt
1image the card
Use the Imager: choose Raspberry Pi OS Lite (no desktop, smaller and faster), select the card, and fill in the OS customisation settings.
2first boot
Insert the card, apply power, and give it a minute. With no monitor, watch the green activity LED settle instead of a login screen.
3find it and log in
On most networks the board answers at yourhostname.local through mDNS; the next sections cover finding its IP address and logging in over SSH.
The UART serial console, enabled next, is the other door into a headless board, and the one that works even when the network does not.

SSH: logging in and keys
4 min readThe client is ssh. Log in with ssh user@host or ssh user@192.168.1.50; the first connection asks you to confirm the host's fingerprint, which you accept once. Files copy with scp, which uses the same connection:
scp hello.c pi@raspberrypi.local:
scp pi@raspberrypi.local:/etc/os-release .
The first copies a file to the Pi's home directory, the second pulls a file back. (Current Raspberry Pi OS keeps its logs in the systemd journal, read with journalctl, so there is no /var/log/syslog to copy.) Replace pi with the username you created: Raspberry Pi OS has had no default pi user since 2022. A bare : means the home directory; a path follows otherwise.
a private key you keep secret and a matching public key you share; data signed with one is verified with the other
Password login sends your password over the encrypted link and checks it against the account. Key login replaces that with a cryptographic proof. Generate a pair with ssh-keygen -t ed25519; it writes the private key to ~/.ssh/id_ed25519 and the public key to ~/.ssh/id_ed25519.pub. Copy the public key to the board with ssh-copy-id user@host, which appends it to the board's ~/.ssh/authorized_keys.
Offer: your client presents the public key it would like to use.
Check: the server looks for that public key in the account's authorized_keys file.
Sign: the client signs data unique to this session (the session identifier from the key exchange) with the private key.
Verify: the server checks that signature with the public key from authorized_keys; only the holder of the private key could have produced it.
Open: on success the server opens the session. The private key never leaves your machine.
Save typing with ~/.ssh/config aliases:
Host pi
    HostName raspberrypi.local
    User pi
    IdentityFile ~/.ssh/id_ed25519
Now ssh pi does the whole thing. When a key login fails, the permissions on the remote files are the usual culprit: ~/.ssh must be 700 and authorized_keys must be 600, or the server ignores them.
Try it below:
Going deeperssh-agent, key reuse and port forwarding
If your private key has a passphrase, ssh-agent remembers it for the session: start it with eval $(ssh-agent) and load keys with ssh-add. Your host can then reuse the key for every connection without typing the passphrase again. The same key also authenticates Git pushes, so one ssh-add covers the board and your repository. Port forwarding previews a trick the later modules use heavily: ssh -L 8080:localhost:80 pi makes the Pi's web service appear at your machine's port 8080, and -R does the reverse, exposing a port of yours on the Pi. Forwarding is how you reach a service that listens only on the board, without opening it to the whole network.
Before disabling password login, log in with the key alone, ideally from a second terminal, and verify it works. Once passwords are off, a lost key means a serial-console rescue, so the serial setup in the next section comes first for a reason.
Serial console and the UART
4 min readWhen a board will not boot onto the network, the serial console is the line that still prints the kernel's messages. The Pi exposes one on its GPIO header: BCM GPIO 14 is TXD (board pin 8), GPIO 15 is RXD (board pin 10), and there are several ground pins. The logic is 3.3 V, and the data is crossed: your adapter's TX wire goes to the Pi's RX pin, and the adapter's RX wire to the Pi's TX pin. Ground connects to ground. TX-to-TX is the classic first mistake, and its symptom is silence.
The the number of symbols per second on a serial line; here bits per second, with 115200 the Pi console default must match on both ends. The framing convention is 115200 8N1: 115200 baud, 8 data bits, no parity bit, 1 stop bit. Every byte is wrapped in a start bit and one or more stop bits so the receiver can find the byte boundaries, since there is no separate clock.
To connect, you need a USB-TTL adapter built around a chip such as the CP2102, FT232 or CH340. This plugs into your laptop's USB port and presents a serial device, usually /dev/ttyUSB0 on Linux. Open the console with one of three tools:
picocom -b 115200 /dev/ttyUSB0
minicom -D /dev/ttyUSB0 -b 115200
screen /dev/ttyUSB0 115200
picocom is the friendliest: exit with Ctrl+A then Ctrl+X. screen exits with Ctrl+A then k. Before the serial port works, enable it on the Pi: run sudo raspi-config, open Interface Options, then Serial Port, and answer yes to the login shell question: that puts the kernel console and a login prompt on the port, which is what you need to capture boot messages (answer no only if you want a bare serial port for your own programs). On a Pi 4 the equivalent config.txt setting is enable_uart=1. The Pi 5 is different: its default console is a dedicated 3-pin debug UART connector, and to use GPIO 14 and 15 instead you add dtparam=uart0_console to config.txt.
Buy a 3.3 V USB-TTL adapter, and if it has a voltage jumper, set it to 3.3 V. A 5 V signal on a GPIO pin can destroy the Pi's system on a chip, which is not repairable.
The Pi's GPIO pins are not 5 V tolerant. A 5 V USB-TTL adapter, a 5 V Arduino, or a power line mistaken for a signal wire will damage the board. Check voltages before connecting anything.
Going deeperRS-232 versus 3.3 V TTL, and flow control
A USB-TTL adapter is not the same as the old DE-9 serial port on a PC. Real RS-232 swings between about -12 V and +12 V, with a mark (idle, or logic 1) as a negative voltage, and uses a DE-9 connector. TTL UART logic uses 0 V for logic low and 3.3 V for logic high, on header pins or a USB cable. The USB-TTL chip converts TTL levels to USB, not to RS-232, so it connects straight to the Pi; a genuine RS-232 port connected directly to a GPIO pin would damage it just like 5 V. Flow control is a handshake for when one side cannot keep up: RTS/CTS uses two extra wires so the receiver can say pause, and XON/XOFF sends control characters in the data stream instead. A console at 115200 8N1 needs neither, because interactive text is slow and buffered; flow control matters when you stream data continuously and cannot afford to drop a byte.

Finding the board and putting it all together
4 min readMost home networks hand out addresses automatically. the dynamic host configuration protocol, by which a router leases an IP address to a device when it joins the network means the Pi's address can change between boots. A static address, set by hand in the Pi's network configuration, never changes, which is useful for a lab board you always reach the same way. On your host, ip addr lists your own interfaces and addresses; arp -a (or the modern ip neigh) shows which MAC addresses your machine has seen, and a router's web interface has a DHCP lease table listing every device and the address it was given.
The friendlier route is mDNS: with Avahi running on the Pi (it is by default), the name raspberrypi.local resolves to the board's address automatically, so you type ssh pi@raspberrypi.local and never learn the IP.
ip addr
ip neigh
ping raspberrypi.local
Windows Subsystem for Linux runs behind its own network stack, and .local names often do not resolve from inside WSL2. If ping raspberrypi.local fails there, find the IP from your router or from Windows, and use the IP directly in ~/.ssh/config.
When the board does not appear at all, diagnose in a fixed order, because each step depends on the one before it. Symptom: no login and no ping. Cause: one of four layers is broken. Diagnosis and fix, in order: confirm the power LED is on and the supply is adequate; confirm the SD card is seated and was imaged correctly (a card that never blinks means no boot); capture the serial log at 115200 8N1, which shows exactly where boot stops; and only then chase the network, checking the cable, the DHCP lease table, and mDNS.
For a board you leave on your desk, harden it the way you would any server. Log in with the key, then edit /etc/ssh/sshd_config, set PasswordAuthentication no, and restart sshd. Keep ~/.ssh at 700 and authorized_keys at 600 on the board. Reuse keys across hosts with ssh-agent and ssh-add rather than copying the same private key everywhere, and reach a board-only service with ssh -L port forwarding instead of exposing it.
The end-to-end loop that proves everything works is short. Edit on the host in VS Code. Sync the change to the board with git push then git pull, or with scp. Build and run on the board:
ssh pi@raspberrypi.local
gcc -g -o hello hello.c
./hello
If that one command runs a program on your board, then your editor, your compiler, your SSH setup and your lab board all work together, and the foundation for the C toolchain lesson is complete.
learner@embeddex:~/lab$ # the name mDNS advertises on the local network
learner@embeddex:~/lab$ hostname
embeddex
learner@embeddex:~/lab$ # your own interfaces and IP addresses
learner@embeddex:~/lab$ ip -brief address
lo               UNKNOWN        127.0.0.1/8 ::1/128
eth0             UP             172.22.214.87/20 fe80::215:5dff:fe2a:155d/64
learner@embeddex:~/lab$ # the default gateway: the router that hands out DHCP leases
learner@embeddex:~/lab$ ip route
default via 172.22.208.1 dev eth0 proto kernel onlink
172.22.208.0/20 dev eth0 proto kernel scope link src 172.22.214.87
learner@embeddex:~/lab$ # neighbors this machine has exchanged packets with
learner@embeddex:~/lab$ ip neigh
172.22.208.1 dev eth0 lladdr 00:15:5d:35:51:e3 REACHABLE
Try it
1 min readOpen the lab for this session and make the whole toolkit real. Flash the SD card with Raspberry Pi Imager, enable SSH and a user, boot the Pi headless, and log in with ssh. Connect the USB-TTL adapter to GPIO 14 and 15 with the lines crossed, open picocom at 115200 8N1, and capture the kernel boot log. Then clone the course repository, make a small commit, and push it, and run gcc -v to record the target triple for your machine. The practice pack has the exact commands and the checklist from the last section to work through.
Key takeaways
- The terminal, editor, compiler, debugger and version control form one loop: edit, build, run, debug.
- The shell resolves a command through aliases, builtins and the PATH, then joins programs with pipes and redirection.
- gcc is a driver that runs the preprocessor, cc1, the assembler and the linker; gcc -v shows the real sub-commands.
- Git's staging area sits between the working tree and the repository: add stages, commit snapshots, push shares.
- QEMU emulates a whole machine in software, which is slower than hardware but perfect for the M4 and M5 image labs.
- A headless Pi boots without a monitor; SSH and the serial UART are the two reliable ways in.
- The Pi's serial logic is 3.3 V; the UART is crossed TX to RX and runs at 115200 8N1.
- When a board does not appear, check power, then the SD card, then the serial log, then the network, in that order.
Reflect
- Explain to a colleague, in two sentences: describe the role of each tool in the edit-build-run-debug loop and explain why an embedded engineer needs a lab board.
- Which objective are you least sure about? Re-read that section, then do its exercise in the practice pack.
- What surprised you when you ran the commands yourself?
On a real board
Repeat the key commands on your Raspberry Pi or lab board over SSH or the serial console. Note anything that behaves differently from your PC, such as missing tools, a BusyBox shell or a read-only filesystem.
References and further reading
- Official docsGNU Bash Reference Manual
- Official docsGCC online documentation
- Official docsGit documentation
- Official docsOpenSSH manual pages
- Official docsQEMU user documentation
- Man pagestty(1) manual page
- SpecificationRFC 4252: The Secure Shell (SSH) Authentication Protocol
- Official docsVS Code: remote development overview
- BookPro Git book, 2nd edition
- Official docsRaspberry Pi documentation: configure UARTs
- Official docsRaspberry Pi documentation: getting started and Raspberry Pi Imager
Official documentation first. Links checked when the lesson was published.